Git and GitHub Tutorial
Issue a pull request or open an issue (things I will show you how to do) when something doesn't work as I describe it, you get confused, or I skip important steps. This page is on GitHub.
In the below text > indicates a command to be executed in a terminal. Monospaced text in codeblocks (gray areas) that is not prefaced with this character is output from the terminal. Monospaced text outside of codeblocks references commands or objects.
I am going to start with a few value statements about social science research. Your work should be transparent. It should be easy to see everything you did to get from an idea to a finished paper. This means you should use open-source software (not STATA, SPSS, SAS, MATLAB). Nobody should have to buy software to verify that your code produces what you say that it produces. Your data should be available online in the most easily accessible format (i.e., not a proprietary binary format produced by one of the above types of software). Nobody should have to request your data. Any data manipulation should be written in an open-source language as well (no Excel). This should be the transparency standard.
Contents
Git
Git is command line program that handles revision control. It was designed by Linus Torvalds, among many others, to manage the very large code base that is the Linux kernel. There are many people that work on that project and it is very complex. People must be able to work asynchronously on versions of the kernel, there has to always be a master version that is useable, they need the ability to go backwards and forwards in the history of the code, and they need documentation for every change made, so that people other than the original author can understand why said change was made. Git solves these problems. It is good for academic work for the same reasons. Your research code of course will not be nearly as complex, but writing manuscripts with collaborators sometimes results in difficulties (conflicted copies in Dropbox, or, shudder, email). With Git you have a record of every change you've ever made to the files in your project folder (code, manuscript, and data), and you can go backwards and forwards in time as needed.
GitHub is a hosting service for Git repositories. It takes your local repositories and puts them online where you can let other people view them (the entire revision history) and work on them with you. This is nice for scholarly work because you should be completely transparent about your work, at the very least after it is published. I wrote a short paper about why this is a good thing for the Political Methodologist, and my own work is done in this manner. If you keep a project in revision control from the beginning all of your changes are visible to anyone that wants to take the time to look at them. GitHub makes this much easier than directly distributing your actual repository.
Alternatives
It is worth noting that the Open Science Framework, which also uses Git (though it is hidden from the user mostly) is a friendlier (but more limiting in some ways) way to do this. It is gaining traction in psychology (one of the leaders/founders of OSF is Brian Nosek, who is also involved with the Reproducibility Project in psychology).
Another important tool is the Dataverse, which allows you to deposit data in their archive and get a digital object identifier (DOI), which is unique and persistent. Git and GitHub aren't ideal for archiving data, especially large data or binary (i.e., non-text) data, so you should use the Dataverse as well.
Installing Git
Installing Git differs depending on your platform. Windows is not a Unix based system and so it is a little bit more of a pain. On OSX you can install it from the command line, which I recommend if you'd like to learn more than the absolute minimum. To do this you need to first install a couple of other things. Follow the homebrew section of my "Setting up OSX for Data Analysis" page.
If you just want the basics you can use GitHub's application. This works like any other OSX application install. Download the file, unzip it (OSX should have an unarchive utility that does this automatically by double clicking on the .zip file). Then drag GitHub.app to your applications folder. Then open the application, input your GitHub username and password. Be sure to install the "command line tools," which you can do in the "advanced" preference pane for the application.
You will want to use RStudio, which is a nice integrated development environment (IDE) for R. Download it, double click on the .dmg file to mount it, and then drag it to your Applications folder and eject the mounted disk. RStudio integrates with Git using "projects" which are just folders with some metadata stored in a .Rproj file. If you've installed Git via one of the above ways RStudio should detect your installation and be able to interact with Git.
If you are on Windows you can install Git a couple of different ways. If you want to use a GUI to interact with Git/GitHub, install GitHub for Windows. You can also use the Git binary, which will install a Bash shell as well. For this tutorial you will need access to a Bash (or Bash-like) shell (terminal). I am not a Windows user so in the remainder of this tutorial you will have to figure out any differences yourself, or, if you are a helpful type, you issue a pull request to my website's GitHub repository that makes the necessary changes. I will of course explain what all that means below.
Open a GitHub Account
Request a free student account. Choose a professional sounding username and a password. Pick a nice picture of yourself!
Using Git
I'm going to start by describing the workflow of using Git at the command line (CLI = command line interface). Even if you intend on using one of the GUIs, you should pay attention to the logic of this workflow so you know what the GUI is doing. You will probably screw something up at some point and have to use the CLI.
Configuring Git
Open a terminal (Terminal.app on OSX) anywhere. To check that Git is in your PATH (addresses of folders which contain applications that the shell looks in to find applications to use) type which git. This should return a filepath. Assuming this works we can do two basic configurations: adding your name and your email.
> which git
/usr/bin/git
> git config --global user.name "Zachary M. Jones"
> git config --global user.email "zmj@zmjones.com"
Be sure to use the name and email you used when creating your GitHub account.
Creating a Git Repository
First, create a folder. On my machine I have a "projects" folder in my home folder but here we'll just create a new folder in the home folder (this is the one with your username). Say the project names is example. I open the Terminal.app, which by default opens in the home folder. I am going to first change directory (cd) to the projects folder, and then make a new directory (mkdir). You can do this with Finder.app too.
> mkdir example
> cd example
Now we have a folder example which is now the present working directory (pwd always gives you the current path). Suppose we had an R script we were working on called data.R. Since this is just to teach you the basics of Git we'll create an empty file that is a placeholder for a real script. touch creates an empty file with its name and extension as the first argument. ls (list) will list all the files in the directory, so after we've "touched" data.R we will verify it is there.
> touch data.R
> ls
data.R
Now suppose we've done some things with data.R: imported some data and cleaned it for example; we've verified that it works as expected also. Now we want to check this file into the revision control system: Git. First we have to initialize a Git repository. We invoke Git commands with git followed by a space and the name of the command you want to use. Note that you can look at the manpage (a sort of manual) for Git with man git.
> git init
Initialized empty Git repository in ~/example/.git/
> git status
On branch master

Initial commit

Untracked files:
  (use "git add <file>..." to include in what will be committed)

    data.R
nothing added to commit but untracked files present (use "git add" to track)
git status, unsurprisingly, tells you what the status of your Git repo is. The first line tells you that you are on branch "master". Branches are versions of the files in the local repo. You can create as many branches as you like. We'll talk more about branching later.
We can see that data.R is listed as an untracked file: Git is not versioning it. You can have untracked files in a folder that has a Git repo. In fact, you can make it so that some files don't even show up in the output from git status by creating a file called .gitignore (just a text file with no extension, the dot on the front indicates that it is a hidden file which will by default not show up in the Finder), and adding the file names that you don't want to see (one per line). You can use patterns in this as well to ignore arbitrarily matched files (don't worry if you don't know what this means).
Adding and Committing Files to a Git Repository
We want to track data.R, so we'll add it to the repo.
> git add data.R
> git status
On branch master

Initial commit

Changes to be committed:
  (use "git rm --cached <file>..." to unstage)

    new file:   data.R
Now data.R is staged. This means that we've taken data.R at this point in time and prepared it to be added to Git. As git status says, it has been cached in the staging area. If we made more changes to data.R now, they would not be in the staging area. If you open a text editor (TextEdit.app will do, Microsoft Word will not) and added a line like print("hello world!"), saved the file, and re-ran git status you'd see (I am using echo here to make the tutorial automatic):
> echo 'print("hello world!")' >> data.R
> git status
On branch master

Initial commit

Changes to be committed:
  (use "git rm --cached <file>..." to unstage)

    new file:   data.R

Changes not staged for commit:
  (use "git add <file>..." to update what will be committed)
  (use "git checkout -- <file>..." to discard changes in working directory)

    modified:   data.R
The original file is staged but the modifications are not. We will check in the original file now. This is called "committing." Unsurprisingly the command for this is git commit. If we just typed this command into the terminal it would prompt us to add a commit message, that is, a message describing the changes we've made to the repo. How we edit this message depends on an environment variable called EDITOR. I am not going to bother with describing what environment variables are but if you are curious you can see what yours is by entering echo $EDITOR. We will instead use a flag. Flags are things that come before or after the command name and have a dash or two dashes in front of them and modify what the command does in some way. We will use -m to tell Git that we are going to pass an argument to git commit that is the commit message, which we will enclose in quotes so that the terminal knows there is one argument (a string) rather than a series of arguments.
> git commit -m 'commit one'
[master (root-commit) 3d4d889] commit one
 1 file changed, 0 insertions(+), 0 deletions(-)
 create mode 100644 data.R
> git status
On branch master
Changes not staged for commit:
  (use "git add <file>..." to update what will be committed)
  (use "git checkout -- <file>..." to discard changes in working directory)

    modified:   data.R

no changes added to commit (use "git add" and/or "git commit -a")
As you can see we committed the original file, but the changes we made are still unstaged. Another flag we can use in adding files to the staging area is -A which tells Git to add all the files that are not ignored via .gitignore.
> git add -A
> git commit -m 'commit two'
[master baa9e9d] commit two
1 file changed, 1 insertion(+)
We could skip the adding step by using git -am commit 'commit two'. This combines the a flag, which commits all tracked files, that is, all files you have added at some previous point but have since made changes to but have not yet committed. If/when you write commit messages using a GUI or an editor it is best to write a one line description of the changes the commit makes followed by one blank line, and then a longer (but not too long) description of the changes.
Undoing Things
Sometimes you commit some changes, and then make some more changes that you wish you could have included in the last commit (usually an organizational thing). You can fix this by ammending the last commit with these new changes. Suppose we add a new line to data.R: print("a second line") (I am going to use echo and a pipe to do this, but that is just to make this tutorial fully automated). To add this to the previous commit:
> echo 'print("a second line")' >> data.R
> git add -A
> git commit --amend -m 'new second commit'
[master 5a3d0a6] new second commit
1 file changed, 2 insertions(+)
Now if we want to look at the commit history, which we can do with git log, we see we have only two commits, the second of which (shown at the top, is the result of the first change we made after creating data.R and the change that we ammended the second commit with, along with the new commit message).
> git log
commit 91299ac8c2034236402d907b4914ea69cd1c8e8b
Author: Zachary M. Jones <zmj@zmjones.com>
Date:   Tue Jan 20 22:13:03 2015 -0500

    new second commit

commit 720388479028657feb7e10778e5ad04d857d7685
Author: Zachary M. Jones <zmj@zmjones.com>
Date:   Tue Jan 20 22:12:35 2015 -0500

    commit one
Another common error is staging a file before you should (i.e., before you are done making the changes you want to commit). Say we created a new file analysis.R, and accidentally added that to the staging area (say by executing git add *, where * is a wildcard operator that adds all files). We can remove analysis.R from the staging area by:
> touch analysis.R
> git add *
> git reset HEAD analysis.R
In this case removing analysis.R from the staging area also means that it is no longer tracked, since we never committed it. We can just delete it now: rm analysis.R. HEAD is a reference to the latest commit on your current branch (discussed in the next section).
If, instead of simply unstaging a file, you want to discard all the changes you've made to a file since the last commit, we can use git checkout. Again, this is discarding your changes. You won't be able to get them back. Say we delete a line from data.R, but now we wish we had not. The line below "checks out" (like a library book) the copy of the file as it was at the last commit in the branch that you are in (this last part will be explained in the next section). In this case it means that data.R will revert to the last previous version in branch master.
> echo 'print("a mistake")' >> data.R
> git checkout -- data.R
> cat data.R
print("hello world!")
print("a second line")
As you can see from the output of cat, which just prints the contents of the file, print("a mistake") is gone since we never committed that change.
Branching and Merging
A branch is a copy (not technically correct, but close enough) of the Git repository made at a particular time which operates independently of other branches. As previously mentioned by default there is one branch: master. To list the current branches use git branch. Branches are useful for working on discrete chunks of a project. With a large software project, for example, there are often any number of bugs at one time, and/or features to be added. A branch would be created for each discrete task. Then someone would work on said task (in said branch) until it was complete and they had verified that it works. Then the branch would be merged back into the master branch. This is useful because in completing each of these discrete tasks there are often many intermediate stages where the task is not complete, and it would be inappropriate to treat it (at that stage) as complete. This is sometimes less relevant for academic work which isn't being actively used by other people during its development, but, if you do develop academic software (R packages for example), this may be the case, and so it is important to have a master branch that is always working.
Let's create a new branch called "newbranch" and then switch so that we are in that branch rather than master.
> git branch newbranch
> git branch
* master
  newbranch
> git checkout newbranch
Switched to branch 'newbranch'
As you can no doubt guess, * indicates the current branch.
Now that we are in our new branch let's make some changes.
> echo 'print("branches are useful!")' >> data.R
> git add data.R
> git commit -m 'first change on new branch'
[newbranch c141ee5] first change on new branch
 1 file changed, 1 insertion(+)
Now, if the feature or bug we created newbranch for was fixed (and we had tested it to make sure), we could merge the changes we made to newbranch into master. We do that with git merge. First we need to switch into the branch we want to merge into. Then we use git merge to merge newbranch onto master.
> git checkout master
Switched to branch 'master'
> git merge newbranch
Updating 5a3d0a6..c141ee5
Fast-forward
 data.R | 1 +
 1 file changed, 1 insertion(+)
> git log
commit 67a04e81af205ad65a3d01e8a9b27fd7f536e60f
Author: Zachary M. Jones <zmj@zmjones.com>
Date:   Tue Jan 20 22:49:52 2015 -0500

    first change on new branch

commit cdb826b6fb90d2b7344ac6cb27d8f11e7f3fffa8
Author: Zachary M. Jones <zmj@zmjones.com>
Date:   Tue Jan 20 22:47:27 2015 -0500

    new second commit

commit 3e662b92880fda52a5e70f281e290002743cf5f2
Author: Zachary M. Jones <zmj@zmjones.com>
Date:   Tue Jan 20 22:47:07 2015 -0500

    commit one
Now we can see via git log that the commit we made to newbranch is now on master. A shortcut for creating a new branch and switching to it is the b flag used with git checkout, e.g. git checkout -b newbranch.
You can delete branches with the d flag, e.g., git branch -d newbranch.
When HEAD (the latest commit) in the two branches to be merged have no conflicts, merging is fairly simple. If master had changes to it made after the creation of newbranch, but those changes did not conflict with the changes made to newbranch, a recursive merge (based on the last common ancestor) would have been completed automatically. When changes have been made that are incompatible with one another (i.e., changes were made to the same line of code), there is a merge conflict. Let's create a merge conflit.
> git checkout -b fix
Switched to a new branch 'fix'
> echo 'change in fix branch' >> data.R
> git commit -am 'first commit in fix'
[fix fb34226] first commit in fix
 1 file changed, 1 insertion(+)
> git checkout master
Switched to branch 'master'
> echo 'change in master branch' >> data.R
> git commit -am 'third commit to master'
[master eaf6894] third commit to master
  1 file changed, 1 insertion(+)
So we've made two conflicting changes to data.R. If we try to merge them we get an error.
> git merge fix
Auto-merging data.R
CONFLICT (content): Merge conflict in data.R
Automatic merge failed; fix conflicts and then commit the result.
In this situation Dropbox would create a "conflicted copy." Git does a similar thing. It marks the conflicts in the file for you.
> cat data.R
print("hello world!")
print("a second line")
print("branches are useful!")
<<<<<<< HEAD
change in master branch
=======
change in fix branch
>>>>>>> fix
This tells you that HEAD in the current branch master conflicts with the fix branch on the line listed above the line of =. So you have to pick the one you want. Open TextEdit.app (or Emacs, Vim, or Nano, etc.) and manually fix the problem by deleting the line you don't want along with Git's markers for the conflict. I chose to keep the change from the fix branch, so my file looks like this:
> cat data.R
print("hello world!")
print("a second line")
print("branches are useful!")
change in fix branch
Now we can add and commit data.R to complete the merge. In this case this is trivial since the only change we made was the conflicted change, but in practice you'll generally have lots of changes that merge automatically and a few that conflict.
> git commit -am 'completed merge of fix'
[master 9d7ee1f] completed merge of fix
Rebasing
Rebasing is another way to combine branches. In the situation I described above where after newbranch was created there were additional commits to master (resulting in a recursive merge) rebasing instead temporarily resets newbranch to its initial state (before any additional commits), applies the additional commits made to master, and then applies then new changes to newbranch up until HEAD. Rather directly applying HEAD from newbranch to master (in our example). If you haven't deleted newbranch you should now (git branch -d newbranch). We are going to recreate it.
> git checkout -b newbranch
Switched to a new branch 'newbranch'
> echo 'change to newbranch' >> data.R
> git commit -am 'addition to data.R'
[rbranch f8fa958] addition to data.R
 1 file changed, 1 insertion(+)
> git checkout master
> touch analysis.R
> git add analysis.R
> git commit -m 'new file added to master'
[master e4d2d55] new file added to master
 1 file changed, 0 insertions(+), 0 deletions(-)
 create mode 100644 analysis.R
> git checkout newbranch
Switched to branch 'newbranch'
> git rebase master
First, rewinding head to replay your work on top of it...
Applying: addition to data.R
> git checkout master
Switched to branch 'master'
> git merge newbranch
Fast-forward
 data.R | 1 +
 1 file changed, 1 insertion(+)
Here we first created a new branch newbranch, added a line to data.R, and committed to this change. Then we went back to master, added a new (blank) file analysis.R, and committed that change. So now we have newbranch with a change not in master and vice versa. We could merge this directly as we did in the previous section, but instead we will rebase. We go back to newbranch and rebase on master. This applies the new commit in master to newbranch and then applies the new commits on newbranch up until HEAD. We then switch back to master and merge in newbranch, which "fast forwards" master. If you want to look at the log (git log) you will see that first the commit adding analysis.R was applied (which was originally committed to master) and then the addition to data.R (made in newbranch). After you are satisfied you can delete newbranch if you like.
This seems to be a lot of work to do what we did in a few lines with git merge. In this simple case it is not so useful. It is very useful when you have nested branches that you don't want to apply all at once. Look at Pro Git for more information on this.
Remotes and Remote Branches
A remote is a reference (pointer) to a repository that is not on your local machine (GitHub for example). A remote branch is a branch in a remote repository. Generaly the remote and the remote branch are referred to in the following format remote/branch. For example if your remote was named origin and the remote branch was master, we'd reference it as origin/master. origin is the default remote name like master is the default branch. So when you clone a repository from GitHub (which we'll go over shortly), you'll have a remote called origin which refers back to the repository from which you cloned it.
As an example I've created a remote repository called example.You should do the same (skip to the next two sections to see how to do this). Add a README and a LICENSE via GitHub when doing this. In all the remaining code substitute my username zmjones for yours. You'll see a screen that looks like the one below.
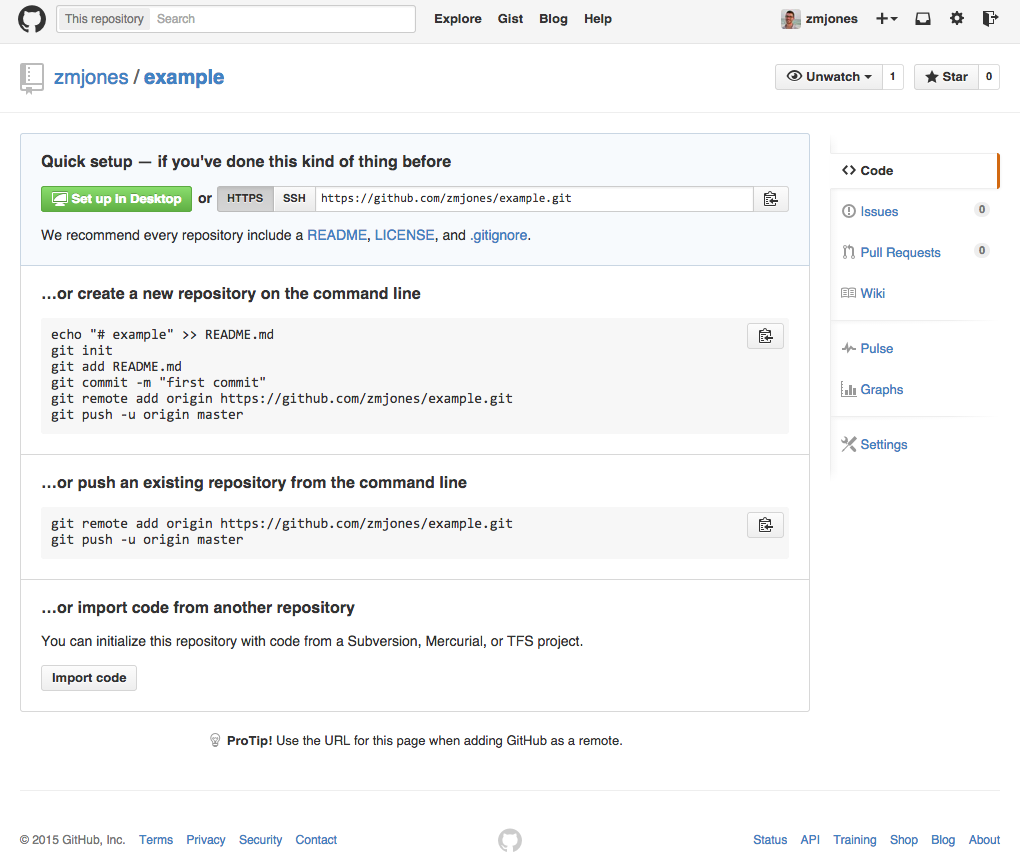
First, add the remote as it is given to you. In my case:
> git remote add origin https://github.com/zmjones/example.git
> git remote -v
origin  https://github.com/zmjones/example.git (fetch)
origin  https://github.com/zmjones/example.git (push)
The v flag makes the output "verbose." We can now see the address for fetching and pushing, both of which we will now go over. They mean what you would think they mean. Pushing pushes commits you have made to your local branches to corresponding branches in the remote repository. Fetching retrieves commits made to the remote repository.
> git push origin master
To https://github.com/zmjones/example.git
 ! [rejected]        master -> master (fetch first)
error: failed to push some refs to 'https://github.com/zmjones/example.git'
hint: Updates were rejected because the remote contains work that you do
hint: not have locally. This is usually caused by another repository pushing
hint: to the same ref. You may want to first integrate the remote changes
hint: (e.g., 'git pull ...') before pushing again.
hint: See the 'Note about fast-forwards' in 'git push --help' for details.
As you can see dealing with remote repositories can create the same merge issues that we went over in the previous two sections. This typically occurs when there are multiple people working on a particular repository. That is, there will be situations in which your local branch (probably master) is behind the same remote branch (this is the case now). When you go to push commits to the remote repository, which requires them to be merged (onto the remote branch), and the remote branch is ahead of your local branch, your push will be rejected. You first need to fetch or pull the new commits from the remote repository and merge them into the relevant local branch. Then we can push our commits to the remote repository.
> git fetch origin
From https://github.com/zmjones/example
 * branch            master     -> FETCH_HEAD
error: Terminal is dumb, but EDITOR unset
Not committing merge; use 'git commit' to complete the merge.
> git merge origin/master --commit -m 'merge github changes'
Merge made by the 'recursive' strategy.
 README.md | 1 +
 1 file changed, 1 insertion(+)
 create mode 100644 README.md
 > git push origin master
Counting objects: 24, done.
Delta compression using up to 8 threads.
Compressing objects: 100% (16/16), done.
Writing objects: 100% (23/23), 2.12 KiB | 0 bytes/s, done.
Total 23 (delta 4), reused 0 (delta 0)
To https://github.com/zmjones/example.git
ccc6d55..5e057bd  master -> master
Now if you go to http://github.com/zmjones/example/commits/master you can see a list of all of the commits we've made thus far. If you click on each commit you'll see a diff (difference): green indicates additions to a file and red indicates deletions. You can do that at the command line too with git diff (which will open whatever application is set as EDITOR. You can see what is with echo $EDITOR).
We can set a branch to track a remote branch (synonomous with an upstream branch) with the u flag and git branch.
> git branch -u origin/master
Branch master set up to track remote branch master from origin.
Now, say we add another commit to our local master branch, which is now tracking origin/master.
> echo 'another line' >> data.R
> git commit -am 'another commit'
[master f11a0c1] another commit
 1 file changed, 1 insertion(+)
> git branch -vv
  fix       5e760d4 first commit in fix
* master    f11a0c1 [origin/master: ahead 1] another commit
  newbranch 5edfabe addition to data.R
Now we can see that master (local), which tracks origin/master (remote) is one commit ahead. We can of course fix this by pushing again.
> git push origin master
Counting objects: 5, done.
Delta compression using up to 8 threads.
Compressing objects: 100% (3/3), done.
Writing objects: 100% (3/3), 296 bytes | 0 bytes/s, done.
Total 3 (delta 2), reused 0 (delta 0)
To https://github.com/zmjones/example.git
   5e057bd..f11a0c1  master -> master
Reverting
If you want to temporarily revert to a particular commit you can do so by referencing that commit's hash. You can think of a hash as a unique identifier for each commit. Let's revert to our second to last commit which as hash 5e057bdca27214b2a948e31fb6656a7f08293d4c, which I looked up with git log.
> git checkout 5e057bdca27214b2a948e31fb6656a7f08293d4c
Note: checking out '5e057bdca27214b2a948e31fb6656a7f08293d4c'.

You are in 'detached HEAD' state. You can look around, make experimental
changes and commit them, and you can discard any commits you make in this
state without impacting any branches by performing another checkout.

If you want to create a new branch to retain commits you create, you may
do so (now or later) by using -b with the checkout command again. Example:

  git checkout -b new_branch_name

HEAD is now at 5e057bd... merge github changes
As the message explains, HEAD now points to this commit rather than the most recent one. If we want to instead make changes that we might want to keep we can create a new branch.
> git checkout -b alt_branch
Switched to a new branch 'alt_branch'
> echo 'addition from alt_branch' >> data.R
> git commit -am 'first change from alt_branch'
[alt_branch 2e5f91a] first change from alt_branch
 1 file changed, 1 insertion(+)
> git checkout master
Switched to branch 'master'
Your branch is up-to-date with 'origin/master'.
We know there is going to be a merge conflict between alt_branch and master since HEAD on alt_master is before "another line" was added to data.R (this was done in the most recent commit in master). We can check this by trying to automatically merge them, or we could just manually fix the conflict (which we'll have to do anyway).
> git merge alt_branch
Auto-merging data.R
CONFLICT (content): Merge conflict in data.R
Automatic merge failed; fix conflicts and then commit the result.
> cat data.R
print("hello world!")
print("a second line")
print("branches are useful!")
change in fix branch
change to newbranch
<<<<<<< HEAD
another line
=======
addition from alt_branch
>>>>>>> alt_branch
I edited the file to look like the one below.
print("hello world!")
print("a second line")
print("branches are useful!")
change in fix branch
change to newbranch
another line
addition from alt_branch
And then finished committing the merge.
> git commit -am 'merged alt_branch'
[master ecf4703] merged alt_branch
Now suppose we wanted to throw away these last two changes. We can do this with git reset. We need the hash of the commit we want to reset two (there are shortcuts for this I am not covering): f11a0c1848cf49b0d1f60923eecab269dba6e030.
> git reset --hard f11a0c1848cf49b0d1f60923eecab269dba6e030
HEAD is now at f11a0c1 another commit
> git log -2
commit f11a0c1848cf49b0d1f60923eecab269dba6e030
Author: Zachary M. Jones <zmj@zmjones.com>
Date:   Wed Jan 21 14:47:21 2015 -0500

    another commit

commit 5e057bdca27214b2a948e31fb6656a7f08293d4c
Merge: 5edfabe ccc6d55
Author: Zachary M. Jones <zmj@zmjones.com>
Date:   Wed Jan 21 14:04:57 2015 -0500

    merge github changes
Those two commits are gone for good unless you have them backed up another way. Be careful with this!
Using GitHub
GitHub's help is helpful. Check it out. I am just going to describe the basics.
As I said before, GitHub hosts Git repositories that you have on your local machine. There are public repositories and private repositories. You generally have to pay for the latter but the educational account gives you 5 free private repositories for 2 years. The private repos are nice for keeping things under wraps, though I don't think that there are generally any consequences to sharing work in progress. The chances you are going to get scooped are grossly overstated IMO. Most of my projects have failed and were public and I don't think I have suffered any consequences from that (other than mild angst about it).
You can create a repository on GitHub by clicking the "new repository" button on the right panel. This prompts you to input a repo name (use the same name as your project folder). Then you will see a page that tells you how to add the correct remote to an existing local repository, or to create one and add the correct remote.
Forking is when you take someone else's Git repo hosted on GitHub and make a copy of it on your own GitHub account. To fork a repository go to that repository's page, and click the "fork" button in the top right. You can fork the example repository that I just created. This gives you a copy of the repository that lives on your GitHub page. The purpose behind this is that if I have a software project I am not going to hand out commit access to people I don't trust. So the most efficient way to allow people to contribute to my project is to allow them to copy it, make changes to their copy, and then show me what they have changed, which I can then merge into the original copy if I want. This is called a pull request, which will be discussed in the next section.
Cloning is when you copy a Git repository hosted on GitHub and download it to your local machine. You can clone repositories in your own account and repos in other people's accounts. So you can clone a forked repository. Cloning gives you the entire repo: all branches and the entire commit history.
Starring a repository is the same as favoriting it. The person who created it feels nice and you can remember to look at it again later. Repositories that you star show up in your public feed, so anyone who follows you (i.e., repositories you create and star show up on their homepage) will see them. It is a nice way to discover new things. I have a couple hundred repositories starred. There are a few political scientists on GitHub (fewer actually do things): Thomas Leeper, Pablo Barbera, Carlisle Rainey, John Bieler, and Jeff Arnold are some you should check out. There are a whole lot more "data scientists" that generally have their formal education in math, statistics, or computer science but develop software relevant to our type of work: John Myles White, Kevin Ushey, Hadley Wickham, Giles Louppe, and Yihui Xie for example.
Contributing
As I previously mentioned, the way to contribute to a project on GitHub is to fork that repository, make changes to your forked copy locally, push those changes to your remote forked copy (on GitHub) and then to issue a pull request on the original repository which requests that the changes you made to your forked copy be merged into the original repository. Try this with my example repository at github.com/zmjones/example. Then you need to clone your forked copy of my repository to your local machine. Instructions for doing this are in the lower right hand corner of every repository. Cloning a repo downloads it to the place that you executed git clone, creates a folder with the same name as the repository, and then puts the contents of that repo in the folder.
The basic GitHub workflow is below.
- Fork
- Clone
- Make changes
- Commit changes
- Push changes
- Issue pull request
We have now covered 1-5. 6 is easy. Use the green button on the left hand side of your forked repo (after completing 1-5). Select your master branch on the left hand side pull down menu, and my master branch on the right hand side. Then click the "create pull request" button, type a coherent description of what change you made and why I should merge it, and submit it.
In the event that your PR is not up to the standards of the owner of the repository, you can ammend your pull request by making more changes locally and pushing them to the remote branch of your forked repository that you've issued the PR from.
Difficulties in merging PR can occur when the original repo moves forward in the time between when a fork was created and a PR issued. That is, the forked copy that you have made changes to may be out of date. The easiest way to fix this problem is to merge the branch you have (or intend to) issue a PR from with the target remote branch. Usually this starts by creating a new remote (other than origin) which tracks the target remote repository. If you were to target my example repository you would execute the below commands. The output is ommitted here because I don't have two GitHub accounts to simulate this with. This presumes that there have been changes made to the target repository that are not in your local forked copy. I am presuming that the target is upstream/master.
> git remote add upstream https://github.com/zmjones/example
> git fetch upstream
output...
> git merge upstream/master
> git commit -m 'merge upstream/master'
> git push origin master
Barring merge conflicts here, which you would have to deal with in the fashion outlined earlier, you will be able to cleanly merge your PR.
Resources
My computing page has a section on Git that lists many of the resources I find helpful. The most important is definitely Pro Git. When stumped with a problem you should start by reading the relevant manpage. If you wanted to know how to revert something, for example, it would be good to execute man git-revert and read a bit before asking a question on StackOverflow or using your Google-Fu. This will build understanding!